How to Build an Incident-Investigation Readiness Drill in 21 Days
A practical 21-day method for testing whether your organization can protect people, preserve evidence, and make sound decisions after a serious incident.

Key takeaways
- 01A readiness drill tests the first decisions before a serious incident exposes weaknesses in the investigation process.
- 02The exercise should assign precise decision rights for care, scene control, work suspension, evidence preservation, notification, and investigation leadership.
- 03A useful evidence map separates physical evidence, digital records, human accounts, and decision history.
- 04Witness protection requires individual accounts, open questions, and safeguards against shared stories that contaminate memory.
- 05The strongest result is field verification showing that safer investigation practices remain usable when operational pressure returns.
Most organizations only discover whether their investigation process works after someone is hurt, a scene is disturbed, or the first witness has already left the site. By then, the investigation team is trying to recover evidence while production pressure, legal concern, and memory loss are changing the story.
A readiness drill changes that timing. It lets an EHS manager test the first decisions before a serious event occurs, using a controlled scenario that reveals whether people know who protects the scene, who preserves records, who can stop work, and who must be informed. The purpose is not to rehearse a perfect investigation. It is to expose the weak handoffs that make reliable evidence difficult to obtain.
What you need before starting
Choose one credible scenario that could occur in your operation, such as a dropped load, an unexpected release of stored energy, a chemical exposure, or a serious near miss involving a contractor. The scenario should be specific enough to create decisions but not so detailed that participants can simply repeat a memorized response.
Invite the people who would actually act during the first hours. That normally includes the area supervisor, the EHS lead, operations, maintenance, security, human resources, and a communications or legal representative when those functions exist. James Reason's work on latent failures is useful here because the drill should test the conditions around the event, not just the visible action of the last person involved.
Step 1: Define the investigation scenario
Write a one-page scenario with a location, task, immediate consequence, and three facts that are intentionally incomplete. For example, a contractor is found injured near a temporary lifting arrangement, the equipment has been moved, and a supervisor says the lift plan was available, although nobody can say which revision was in use.
Set a clear start time and a fixed stopping point. Tell participants that the drill will not judge technical expertise in the fictional event. It will assess whether the organization can protect people, preserve evidence, make decisions, and communicate without contaminating the facts.
Verify the scenario with the operational owner before the exercise. A drill that is impossible in the real workplace produces false confidence because participants are solving a puzzle rather than practicing their own process.
Step 2: Assign decision rights
List the decisions that must be made during the first hour and name the role that has authority for each one. The list should include emergency care, scene control, work suspension, equipment isolation, evidence preservation, notification, and the appointment of the investigation leader.
Do not accept a list that names only departments. “Operations” is not a decision-maker, and “EHS” is not an escalation path. The role must be precise enough that a person on shift knows whether they can act without waiting for a manager who is off site.
Record every disputed decision during the drill. Confusion about authority is not a minor facilitation issue. It is evidence that the operating system may rely on personal relationships instead of designed control.
Step 3: Build the first-hour evidence map
Before the drill begins, create a blank evidence map with four columns for physical evidence, digital records, human accounts, and decision history. The map should include items such as equipment condition, photographs, permits, isolation records, access logs, CCTV, messages, witness names, shift assignments, and the sequence of approvals.
Ask the team to identify what could disappear, change, or become less reliable within the first hour. A damaged component can be moved for rescue, a control-room screen can refresh, a contractor can leave the site, and a well-intentioned supervisor can ask witnesses to compare stories before interviews occur.
Require an owner and a preservation action for every high-value item. “Take photos” is incomplete unless the team also states who takes them, when, from which angles, where the files are stored, and how the original files remain identifiable.
Step 4: Test scene control without blocking care
Run the scenario through the tension between emergency response and evidence protection. The correct response never delays lifesaving care, but it should define what may be moved, who records the original position, and how the work area is secured after the immediate danger is controlled.
Ask the supervisor to describe the boundary in plain language. A sign on a gate is not enough if contractors, maintenance staff, or managers can enter without logging their purpose. The team should know who controls access, how exceptions are recorded, and who authorizes any change to the scene.
Include one realistic complication, such as a leaking line that requires isolation or weather that threatens outdoor evidence. The complication reveals whether the process distinguishes an unavoidable change from an undocumented convenience.
Step 5: Reconstruct the information flow
Give participants a small set of timed messages, records, and witness statements. Some information should be direct observation, some should be interpretation, and one item should be incomplete. The exercise is successful when the team labels those differences instead of treating every statement as an established fact.
Ask who receives each piece of information, what they do with it, and what decision could have followed. This moves the discussion from “who knew?” to “who had usable information, authority, and time to act?” The distinction matters because a warning that remains inside a technical file has not yet become an effective control.
Capture the exact point at which a concern could have been escalated. If the answer depends on a person being unusually persistent, the investigation process has a resilience gap that should be addressed before the next event.
Step 6: Practice witness contact and interview protection
Nominate one person to coordinate witness contact and another to conduct the first interview. Their tasks are different. The coordinator protects availability and privacy, while the interviewer records what the person saw, heard, did, and understood without turning the conversation into an accusation.
Use open questions first, such as “What happened from your position?” and “What changed before the task began?” Follow with precise questions about timing, equipment, instructions, and decisions. Avoid asking several questions at once because the answer becomes difficult to attribute to a specific observation.
Test whether the team can prevent witness contamination. People should not be encouraged to build a shared story in a group chat or meeting before individual accounts are recorded. The goal is not to create identical statements. It is to preserve differences that may explain how the work was actually understood.
Step 7: Run the decision review
Once the evidence map is populated, ask the team to separate four questions. What happened? Which controls were missing, degraded, or bypassed? Which decisions allowed exposure to continue? What change would make the safer decision easier to execute?
Require the group to distinguish a contributing condition from a corrective action. “Retrain the operator” is not a complete response when the procedure was unclear, the equipment was difficult to inspect, or the schedule rewarded continuation. James Reason's model of latent failures supports this discipline because it directs attention toward system conditions that shape front-line actions.
Close the review by naming the next decision, not by assigning blame. The investigation leader should state what evidence is still missing, who owns the next step, and when the team will return to verify whether the proposed control works in comparable work.
Step 8: Verify the drill and close the gaps
Score the exercise against observable behaviors rather than impressions. Check whether the team identified the right decision-maker, protected the scene without delaying care, preserved original records, separated facts from assumptions, contacted witnesses safely, and documented the reason for each change to the scene.
Convert each weakness into a short improvement card with an owner, due date, evidence of completion, and field verification method. A revised procedure is not proof of effectiveness when the gap involved access, equipment, workload, or authority. The proof should show that people can perform the safer action when the same pressure returns.
Repeat the drill after the highest-risk gaps are addressed, using a different scenario. The second exercise should test whether the organization improved its process rather than whether participants memorized the first answer. In projects supported by Andreza Araujo across more than 250 cultural transformations, practical verification is what turns a written expectation into an operating habit.
How to use the 21-day rollout
Use the first seven days to select the scenario, confirm decision rights, and gather the records that the team would need in a real event. Use the next seven days to run the exercise, capture disagreements, and protect the evidence map from being rewritten after the discussion. Use the final seven days to assign improvements, verify the first changes in the field, and schedule the repeat drill.
| Period | Primary work | Evidence to retain |
|---|---|---|
| Days 1 to 7 | Design the scenario and confirm roles | Scenario, decision-rights map, contact list |
| Days 8 to 14 | Run the drill and record weak handoffs | Evidence map, timed messages, observation notes |
| Days 15 to 21 | Correct, verify, and schedule repetition | Improvement cards, field checks, next drill date |
The central test is simple, although the execution is not. If a serious event happened on the next shift, could your organization protect people and preserve trustworthy evidence without waiting for one exceptional individual to coordinate everything? If the answer is uncertain, the readiness drill has already found its most valuable result.
FAQ
What is an incident-investigation readiness drill?
It is a controlled exercise that tests whether an organization can respond to a potential incident, preserve evidence, assign decision rights, contact witnesses, and review control failures before a real event occurs.
Who should participate?
Include the roles that would act during the first hours, such as the area supervisor, EHS, operations, maintenance, security, and relevant support functions. Participation should reflect the real shift structure rather than an ideal organization chart.
Does a drill replace incident-investigation training?
No. Training explains methods and expectations, while a drill tests whether those methods work under operational pressure. The gaps found in the exercise should guide focused training and process changes.
How can the team avoid blaming the last person involved?
Describe the action accurately, then examine the procedure, equipment, staffing, supervision, workload, authority, and competing objectives that shaped it. James Reason's work on latent failures supports this broader review of causation.
What proves that the readiness process improved?
Improvement is visible when a repeat drill produces faster escalation, clearer evidence ownership, better separation of facts from assumptions, and field controls that remain usable during comparable work. A closed action in a tracker is not enough by itself.
Frequently asked questions
What is an incident-investigation readiness drill?
Who should participate?
Does a drill replace incident-investigation training?
How can the team avoid blaming the last person involved?
What proves that the readiness process improved?
About the author

Andreza Araújo
Safety Culture Expert | Senior EHS Executive
Andreza Araújo is a safety culture expert and senior EHS executive with more than 25 years of experience in environment, health and safety. She is a Civil Engineer and Occupational Safety Engineer from Unicamp, holds a Master's degree in Environmental Diplomacy from the University of Geneva, and completed sustainability studies at IMD Switzerland. Andreza has served in Global Head of EHS roles in Fortune 500 environments, leading cultural transformation programs across multinational operations. She has represented Brazil as a speaker at the United Nations in Paris and has spoken at the International Labour Organization in Turin. She is the author of more than 16 books on safety culture in Portuguese, Spanish, English and German. Her work has earned more than 10 EHS awards, including two recognitions from Indra Nooyi, former PepsiCo CEO.
- Civil & Safety Engineer (Unicamp)
- M.A. Environmental Diplomacy (University of Geneva)
- Sustainability Cert (IMD Switzerland)
- People Management & Coaching (Ohio University)
- UN Paris speaker representative for Brazil
- ILO Turin speaker
- LinkedIn Top Voice
- Indra Nooyi PepsiCo CEO recognition (2x)
Documentaries
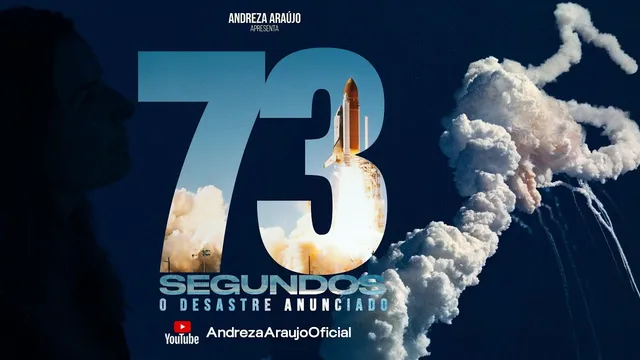
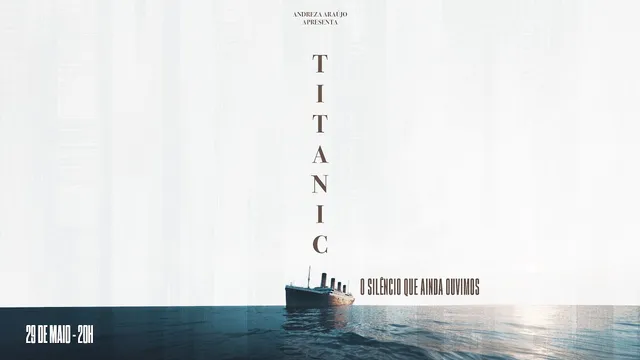
Watch Andreza's documentaries
Three productions on safety culture, organizational failure and the human lessons behind major disasters.

Podcasts
Listen to Andreza's podcasts
She hosts three shows on safety leadership, EHS and organizational culture, in English and Portuguese.